
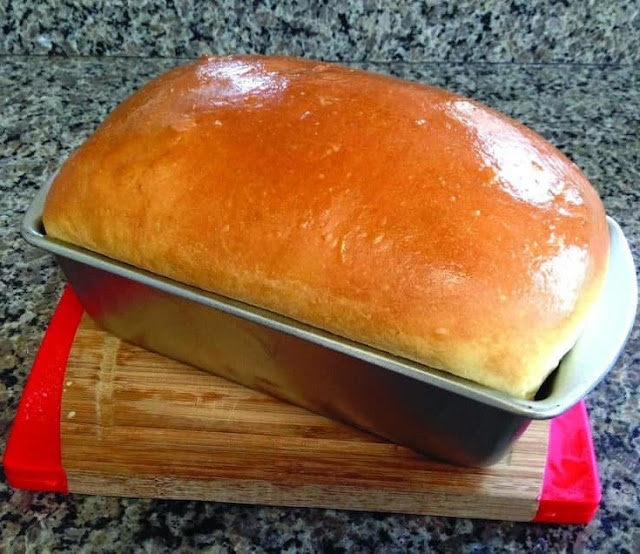

This fluffy country white sandwich bread is the perfect soft sandwich loaf. This homemade version of your favorite store bought fluffy bread is so much better with fewer ingredients!

COUNTRY WHITE SANDWICH BREAD OVERVIEW
This classic white bread recipe is one of my favorite recipes to make. I know making yeast bread can be intimidating for some, but it really doesn’t have to be. This recipe calls for very few ingredients and I’m going to walk you through it step-by-step so that you are successful!
COUNTRY WHITE SANDWICH BREAD
This beautiful and fluffy country white sandwich bread contains no added preservatives. Bake this good wholesome loaf of bread you will feel good about eating!
INGREDIENTS
FOR A FULL BATCH (MAKES 2 LOAVES)
- 2 cups (475 ml) milk, about 110 F (43 C)- can use whole, 2%, 1%, skim or nondairy
- 1/2 cup (120 ml) water, about 110 F (43 C)
- 2 1/4 tsp (1 package) active dry or rapid rise dry yeast
- about 1 tsp of sugar (to proof yeast)
- 6 TBSP (84 gr) unsalted butter, softened and cut into pieces
- 1/4 cup (55 gr) sugar
- 2 tsp fine sea salt
- 6 1/2 – 7 1/2 cups (780 – 900 gr) bread flour or unbleached all-purpose flour
FOR A HALF BATCH (MAKES 1 LOAF)
- 1 cup (240 ml) milk, about 110 F (43 C)- can use whole, 2%, 1%, skim or nondairy
- 1/4 cup (60 ml) water, about 110 F (43 C)
- 1 1/8 tsp (1/2 package) active dry or rapid rise dry yeast
- about 1/2 tsp of sugar (to proof yeast)
- 3 TBSP (42 gr) unsalted butter, softened and cut into pieces
- 2 TBSP (28 gr) sugar
- 1 tsp fine sea salt
- 3 1/4 – 4 1/4 cups (390 – 510 gr) bread flour or unbleached all-purpose flour
INSTRUCTIONS
Note: if you are new to bread baking, I highly recommend you watching the video below to see how to make it!
- PROOF YEAST: Combine the warm water, warm milk, yeast, and 1 tsp of sugar if you are making a full batch or 1/2 tsp of sugar if you are making a 1/2 batch, to a large mixing bowl. Whisk until the yeast dissolves. Let this mixture sit for about 10 minutes. If it is slightly frothy and you can see bubbles forming on top, then your yeast is active. If you don’t see any activity, your yeast is likely too old.
- MIX DOUGH: Add the butter, sugar, salt, and the smallest amount of flour listed (6 1/2 cups if making a full batch, 3 1/4 cups if making a 1/2 batch) to the bowl. Stir with a wooden spoon, bowl scraper, or clean hands until all the flour is hydrated and the ingredients are well incorporated. At this point the dough will likely be very sticky and shaggy. Do not add any more flour yet.
- KNEAD: If kneading the dough by hand, dust a work surface with flour and turn the dough out onto the work surface. Dust flour over the top of the dough and begin kneading it. Add a bit more flour as needed up to 1 more cup. The dough should feel soft and sticky, but it shouldn’t be gluing itself to the counter or your hands. Watch the video tutorial if you are unfamiliar with kneading by hand. Alternatively, you can add the dough to the bowl of your stand mixer fit with the dough hook and knead it on medium-high speed. Add more flour bit by bit to the stand mixer until the dough pulls away from the sides of the bowl. If kneading by hand, knead for about 8-10 minutes. If kneading in the stand mixer, knead for 6-8 minutes. When the dough is smooth and elastic and springs back when a finger is pressed into it, you are done kneading.
- FERMENT (1ST RISE): Grease a clean bowl with a bit of oil or non-stick spray and transfer your dough to the bowl, turning to coat. Cover the dough with a damp towel or a piece of plastic wrap and let rise at room temperature until double in size and filled with air. This will take about 1 hour if using quick rise yeast and 2 hours if using active dry yeast.
- SHAPE: Grease one or two standard loaf pans (8.5 X 4.5 X 2.5) pans on the sides and bottoms. Turn the dough out onto the lightly floured surface and lightly push the air out of the dough with the palm of your hand. Cut the dough into two equal pieces if making a full batch. Gently pat each piece of dough into a rectangle (about the shape of the loaf pan). Tightly form each piece of dough into a loaf. (Watch the video tutorial for details about how to properly do this.)
- PROOF: Place the formed loaves into the pans and gently press down on them with the palm of your hand to ensure they evenly fill the pan. Cover the shaped dough and let them proof at room temperature until the loaves are beginning to crown the pan. This will take about 1 hour for rapid rise yeast and 2 hours for active dry yeast.
- BAKE: Preheat oven to 350°F (180 C). If you want a shiny brown crust, mix 1 egg with 1 tbsp of water and brush it on the tops of your loaves. Bake loaves on the center rack for 35-45 minutes until golden brown. The center of the loaves should read 190-200 F (87-93 C) when fully baked.
- Let cool on baking racks for at least 30 minutes before slicing with a serrated knife.
- STORE cooled bread in a plastic bag at room temperature for 4 days. Alternatively, you can slice the loaves and place them in the freezer in a freezer bag. Toast to refresh. Refrigerating bread will cause it to stale more quickly.